


time createdb -E UTF8 -T template0 xyz

real	0m46.307s
user	0m0.048s
sys 0m0.016sDB作成がやたらと遅い
遅い、 何この遅さは・・・うたた寝できそうなくらい遅い。
ちなみに、ハードウェアはHP ProLiant DL320 G5p(lspci) 。 OSは、Debian GNU/Linux 6.0(kernel 2.6.32-5-686)。
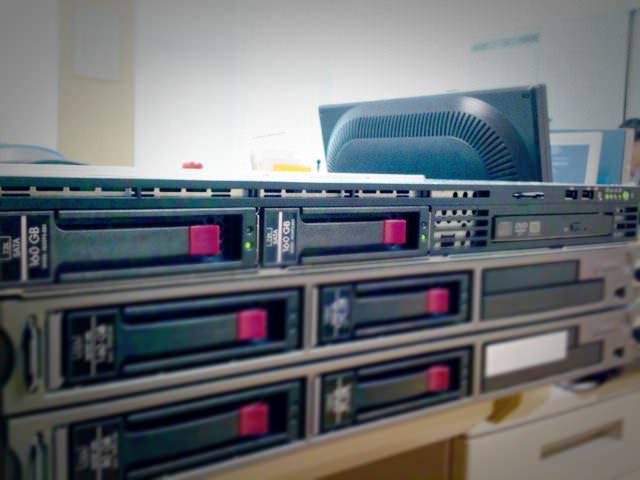
同機種の同じ構成のもので同じことやってみたけど、こんなに遅くない。
キャッシュ無効が原因
dmesgを確認してみると、ディス書込み時のキャッシュが無効になっていることが分かったので、dmesgに以下のように表示されることを目標にして色々と調べました。
【After】
[sda] Write cache: enabled, read cache: enabled, doesn’t support DPO or FUA
【Before】 [sda] Write cache: disabled, read cache: enabled, doesn’t support DPO or FUA
ここら辺(How to Enable Drive Write Cache on SATA Hard Drives for HP ProLiant ML and DL Servers)を当たってみたんだけど、ちょっと違う。
HPのサポートに問い合わせたけど、故障ではない、情報を持っていないと言われたので、やっぱり自分で何とかしようと意を決することに。
途中、「BIOS not installed!」なんてことになってフラフラになりながら解に到達。
LSI LogicコントローラーでWrite cacheの有効化
LSI LogicのコントローラーでRAID 1構成を取っているので、LSIのオフィシャルに何か情報ないかなと探したら「LSI UTIL」というユーティリティーが配布されていまして、このユーティリティを使ってWrite cacheを有効にできます。
LSI UTILの実行
./lsiutil実行結果
Write Catch 有効化
LSI Logic MPT Configuration Utility, Version 1.62, January 14, 2009
1 MPT Port found
     Port Name         Chip Vendor/Type/Rev    MPT Rev  Firmware Rev  IOC
 1.  /proc/mpt/ioc0    LSI Logic SAS1068E B3     105      01172800     0
Select a device:  [1-1 or 0 to quit] 1
 1.  Identify firmware, BIOS, and/or FCode
 2.  Download firmware (update the FLASH)
 4.  Download/erase BIOS and/or FCode (update the FLASH)
 8.  Scan for devices
10.  Change IOC settings (interrupt coalescing)
13.  Change SAS IO Unit settings
16.  Display attached devices
20.  Diagnostics
21.  RAID actions
22.  Reset bus
23.  Reset target
42.  Display operating system names for devices
43.  Diagnostic Buffer actions
45.  Concatenate SAS firmware and NVDATA files
59.  Dump PCI config space
60.  Show non-default settings
61.  Restore default settings
66.  Show SAS discovery errors
69.  Show board manufacturing information
97.  Reset SAS link, HARD RESET
98.  Reset SAS link
99.  Reset port
 e   Enable expert mode in menus
 p   Enable paged mode
 w   Enable logging
Main menu, select an option:  [1-99 or e/p/w or 0 to quit] 21
 1.  Show volumes
 2.  Show physical disks
 3.  Get volume state
 4.  Wait for volume resync to complete
23.  Replace physical disk
26.  Disable drive firmware update mode
27.  Enable drive firmware update mode
30.  Create volume
31.  Delete volume
32.  Change volume settings
33.  Change volume name
50.  Create hot spare
51.  Delete hot spare
99.  Reset port
 e   Enable expert mode in menus
 p   Enable paged mode
 w   Enable logging
RAID actions menu, select an option:  [1-99 or e/p/w or 0 to quit] 32
Volume 0 is Bus 0 Target 1, Type IM (Integrated Mirroring)
Volume 0 Settings:  write caching disabled, auto configure
Volume 0 draws from Hot Spare Pools:  0
Enable write caching:  [Yes or No, default is No] Yes
Offline on SMART data:  [Yes or No, default is No] return
Auto configuration:  [Yes or No, default is Yes] return
Priority resync:  [Yes or No, default is No] return
Hot Spare Pools (bitmask of pool numbers):  [00 to FF, default is 01] return
RAID ACTION returned IOCLogInfo = 00010005
RAID actions menu, select an option:  [1-99 or e/p/w or 0 to quit] 0
Main menu, select an option:  [1-99 or e/p/w or 0 to quit] 0
     Port Name         Chip Vendor/Type/Rev    MPT Rev  Firmware Rev  IOC
 1.  /proc/mpt/ioc0    LSI Logic SAS1068E B3     105      01172800     0
Select a device:  [1-1 or 0 to quit] 0
OS再起動後にもう一度、PostgreSQLでcreatedbした結果。
time createdb -E UTF8 -T template0 xyz

real	0m0.651s
user	0m0.052s
sys	0m0.008s
Before
real	0m46.307s
user	0m0.048s
sys	0m0.016s
After
real	0m0.651s
user	0m0.052s
sys	0m0.008s
まずまずの結果が出ました。




この記事へのコメントはありません。